Adventures in Groovy – Part 29: Troubleshooting Data Movement With GridBuilder

One of the challenges working with grids is validating the results.  As with an Essbase calculation, Smart View reports are developed to validate results.  The same happens when calculations, or data movement, is executed in Groovy via grids.  When the results in Smart View aren’t accurate, where do you go?

Make It Simple

By now you have probably used the grid iterator to iterate through cells to validate data, write values to the log, and check to see if the cells have been edited.  The same can be done with GridBuilders.  All aspects of the grid can be logged.  If done correctly, this can be copied directly from the log and pasted into excel to accomplish 2 things.  One, you have a report in Excel.  Two, you have a Smart View ready ad-hoc report that can be refreshed.

Send The Grid To The Log

Grids can be different so this may be a start for you to construct this validation.  This example has 2 column headers.  The rest should be very close and likely completely reusable.  To break this down, we have a source grid we are pulling data from to create a grid to send to another plan type.  Basically, this loops through the members in the POV and replicates rows for the number of columns in the grid.  This is repatative, but it will provide a retrievable Smart View.

// Loop through the POV to create column headers for each
povmbrs*.essbaseMbrName.each{ POV ->
  // Add a blank column for the row members
  print ','
  // Loop through the columns and repeat the POV member for each of the columns
  colmbrs[0]*.essbaseMbrName.size().times{
    print POV + ','
  } 
  // Print a line return for the next POV member
  println ''
}
//Print a blank column and then each of the column headers for both headers
println ',' + colmbrs[0]*.essbaseMbrName.join(',')
println ',' + colmbrs[1]*.essbaseMbrName.join(',')

At this point, the log will show the column headers.  The following is created while looking through the source grid and produces the row header and the respective data for each of the column headers.

...{
  sValues.add(it.crossDimCell(cMonth.toString(),cCurrency.toString()).data) 
  addcells << it.crossDimCell(cMonth.toString(),cCurrency.toString()).data
}
// After the variables are created with the numeric data to be used when creating the rows, the row is created
finGrid.addRow([acctMap.get(it.getMemberName('Account'))],addcells)
// Print to the log exactly what is being used to create the grid
println "${it.getMemberName('Account')}" + "," + sValues.join(",")

At this point, the entire Smart View is created in the log and can be copied and pasted to Excel.  The log will look something like this.

When pasted into a text editor that doesn’t wrap, it looks a little more palatable!

Create An Excel Report / Smart View Ad-hoc

At this point, you are ready to get this into Excel.  Select the part of the log related to the validation and copy it to Excel. I normally wrap the Groovy code above in a few println statements so it is easier to identify what is related to this validation effort and what isn’t.

println '*************** BEGIN VALIDATION ***************'
// CODE ABOVE
println '*************** END VALIDATION ***************'

If it doesn’t parse by comma automatically, go to the Data ribbon and select the option to convert the selection to Text to Columns and select comma.  This will parse it to what is required.  This may not need to be done depending on a few things, which won’t be discussed here.  The result of the example above looks like this.

Finishing

Now there is an easy viewable report of what is being used to create the grid.  If this data is incorrect, move backwards in the process to the source grid and fix it.  This should provide all the information to do that.  Is the POV correct?  For me, this is normally the issue – I am pulling the wrong POV.  Once the source grid POV is changed, go through the process again and you should see better results.


Use Valid Intersections To Bypass Smart Push Security Errors

If you have used Smart Pushes, you have undoubtedly run into security issues.  The PBCS development team is working on a way to bypass this, but there is no release date.  If you haven’t run into this, you probably have and didn’t know it.  Here is the issue.  Dimensional security is typically setup so that users only have access to write to specific accounts.  For example, they have access to update units and cost per unit, but not revenue because revenue is calculated by multiplying units and cost per unit.  The problem is that a Smart Push won’t push revenue because the user doesn’t have access to write to that account.  Said another way, when users update the components of revenue, the revenue itself doesn’t get pushed to the reporting cube because the user doesn’t have write access.  Here in lies the problem, as revenue won’t get updated until an administrator runs a Data Map.

I understand why Oracle did this, but with no ability to override it, it creates issues with Smart Pushes and real time reporting.

Before I continue, I want to thank Pete over at Essbase Down Under for this brilliant idea.  Enter stage left, valid intersections!

What Are Valid Intersections?

Normally, valid intersections are used to link drop down menus.  For example, once Honda is selected in the first menu, the second menu only shows the models related to Honda, like Accord, Civic, and Prelude.  If you know what a Prelude is, you have been doing this as long as I have!  Valid intersections can also limit what users have access to write too, like the rows a user has access to write to in a grid.  If valid intersections are setup on account and accounts are in the rows of a Data Form, the grid will show all the accounts, but the invalid accounts are greyed out and not editable.  Since this isn’t truly security, when the Smart Push is executed, the user has the access to push calculated accounts.

Why Not Cherry Pick Rows As Read Only?

Sure, rows can be set to read only.  If you are thinking about going down this path, beware!  There are some huge issues with this approach.

  1. As hierarchies change, forms will have to be manually changed.  By singling out specific rows, it means administrators lose the benefit of functions, like level 0 descendants.  So, rows will have to be manually maintained every time metadata changes.
  2. Since this is a form setting, users who run ad-hoc retrieves can still write data to these accounts.

Valid Intersections In Action

You might be thinking, yeah, but valid intersections also use level 0 descendants?  They do, but just like in forms, exclusions can be applied.

In the example below, the rows/accounts with the check marks have been setup to be valid with the working scenarios.

In this example, the dimensional security is set to write for all accounts on this form.  As visible below, the dimensional security is ignored.  Users have the access to the accounts needed, but can’t edit those that aren’t setup as valid intersections (selected in the valid intersections setup above).

When the form is saved, and the Smart Push executes, the Smart Push uses dimensional security.  All the data pushes since the users have write access to all accounts!

What About Ad-hoc?

Don’t worry, users can’t change data on the invalid intersections.  Well, sort of.  The rows for the invalid accounts are still greyed out.  Here is where it gets blurry.  Users can still edit the data in those cells, the ones that are grey.  Although this might be confusing to a user, it is ignored on submission.  Below shows the accounts in the above form, but in an ad-hoc.  Notice what happens when the first two rows are changed.  The first row is saved, but the second is not.  It returns to its original value.

Finishing Up

I wish there was a parameter in the Smart Pushes (Groovy or not) that allowed the form developer to set the permissions to use admin privileges.  Until this gets figured out with Oracle, this is a great way to fix the problem.  Everybody that uses Smart Push will run into this.  Setup dimensional security to write to all accounts.  Setup valid intersections for the accounts that users need to be able to edit.  And wallah!


Adventures in Groovy – Part 28: The DataGridBuilders

Gridbuilders are the link to moving data from BSO to ASO, and ASO to ASO.  Gridbuilders can also be used to save calculated results that are executed directly in Groovy.  If it jumped into your head, yes, you can completely bypass the Essbase calculation engine.  I have a coworker that has done exactly that – everything in Groovy and had all the forms connected directly to ASO!  There is an example of this in my presentation at KScope, Last Minute ODTUG Planning Sourvenirs.  Before we get too far ahead, back to the basics.

Welcome to Grids

Creating grids is the same as creating a Smart View report.  They have POVs, column and row headers, and of course, the data grid.

Gridbuilders come in two forms.

  1. The DataGridDefinitionBuilder is used to read data.
  2. The DataGridBuilder is used to submit data.

The later can use functions like ILvl0Descendants and can suppress missing rows.  Both can return status information about the volume of data the grid retrieves/submits.


The DataGridDefinitionBuilder

The first grid discussed will be the reader grid.  This grid can be used in processes to get currency tables, read data to be used in calculations, or make decisions on the logic to execute.  It can also be used to be the source of data moved to another location or plan type.  Try not to make this too complicated.  It really is exactly the same as a Smart View adhoc retrieve.

The first step is to create a connection to the cube, or plan type, and initiate the GridDefinitionBuilder object.

// Setup the connection to the plan type
Cube cube = operation.application.getCube("Plan1")
//Create the grid definition builder
DataGridDefinitionBuilder builder = cube.dataGridDefinitionBuilder

Now that the object is created and connected to a source, the next step is to setup the grid.  This can be done in any order that makes sense to you because it isn’t used until the grid is built.  Personally, I start with the POV.  If you understand collections, particularly lists, this will seem pretty simple.  If you don’t know what Groovy lists are, read Part 27: Understanding Collections.  Creating the POV requires two parameters.  The first is the list of dimensions.  The second is the list of members in the corresponding dimensions.  The first parameter is one list (a comma delimited list inside brackets).  The second parameter is a list of lists.  I will explain why a little later.  Each sub-list has only one member, but it is still a list.  The format of this is [[member1],[member2]].  So, it is a comma delimited list of embedded lists.  It is important to understand this.  If you are just replicating this example, you are doing yourself an injustice because you will struggle when you start throwing in variables and trying to create efficient ways to create these based off of a POV of the grid the user interacts with.

// Add the POV – Dimensions and a collection of the members in those dimensions
builder.addPov(['Years', 'Scenario', 'Currency', 'Period', 'Version', 'Entity’], [['FY16'], ['Current'], ['Local'], ['BegBalance'], ['BU Version_1'], ['No Entity’]])

The next thing I do is create the columns.  Again, understanding lists is critical to become efficient with these classes and methods.  I will sound like a broken record, but I wish I had somebody tell me this 6 months ago.  The column requires the same two parameters in the same formats.  The first is a list of the dimensions.  The second is a list of the lists of members associated to those dimensions.  The difference from the POV is that multiple members can be added to each dimension.  It might be more clear why the second parameter is a list of lists, now.  If it wasn’t, distinguishing which members related to which dimensions would be a jumbled mess with just a comma delimited list of members.  Just like with Smart View, columns can have multiple headers.

// Add the columns – 2 parameters, collection of dimensions and 
// collection of collections of members in those dimensions
builder.addColumn(['Years', 'Account’],
[['Children(Years)'],['Min Salary','Max Salary','Min Bonus','Max Bonus']])

The rows are identical to the columns, so I won’t repeat the narrative above.

// Add rows no data - in this class as it is retrieving data
builder.addRow(['Grades'], [ ['ILvl0Descendants("Grades")']])

Before we proceed, the addColumn and addRow methods can be replicated multiple times (you know this as segments in developing data forms).

Now that the grid is constructed, execute the build method to create the object with all its properties.

// Build the grid
DataGridDefinition gridDefinition = builder.build()

Finally, load the grid, which is the equivalent of refreshing a Smart View template.

// Load a data grid from the specified grid definition and cube
DataGrid dataGrid = cube.loadGrid(gridDefinition, false)

At this point, the grid acts just like a data form.  All the methods and classes are available just as they are on forms.  These grids can be iterated, just like web forms.

The DataGridBuilder

The DataGridBuilder is the class used to submit data to the database.  The construction and use is similar to the DefinitionBuilder, except the use of functions is not relevant, and rather than loading data to the grid, the data is saved to the database.

// Setup the connection to the plan type
Cube cube = operation.application.getCube("Plan1") 
DataGridBuilder builder = cube.dataGridBuilder("MM/DD/YYYY")

What we are creating below would look like this if it was done in Smart View.

Setting up the POV is similar to above, except this time there is no requirement to pass a list.  Also, the identification of the dimensions is not necessary.  All that is needed is a comma delimited list of members.

// Setup the grid POV, Rows, and Columns
builder.addPov('Salary', 'Current', 'Local', 'BU Version_1’)

Setting up the columns is also slightly different.  The dimensions are again missing and the members are all that is required.  Also, there is a line for each dimension rather than passing it in lists as multiple parameters.  This is exactly the same as setting up a Smart View template.  Each column has to be set.  The example below has 3 columns made up of the year and period dimensions.

builder.addColumn('FY16', 'FY16', 'FY16’)
builder.addColumn('Jan', 'Feb', 'Mar’)

The rows are similar in that there is a slight difference from the DefinitionBuilder, but it does require two parameters.  Each is a list.  The first includes the members of the dimensions in the row headers.  The second are the corresponding values to the column headers above.  The following adds the members from the department and employee, and sets the values for Jan through March of FY16.

// Add rows to the grid
builder.addRow(['Department 1', 'Employee 1'], [30000, 30000, 30000]) 
builder.addRow(['Department 5', 'Employee 2'], [40000, 40000, 40000])
builder.addRow(['Department 1', 'Employee 3'], [30000, 30000, 30000])

Once the grid is laid out, and this can be done before the grid is defined, a status object is created to hold the results of the submission of data.

// Create a status class to hold the results
DataGridBuilder.Status status = new DataGridBuilder.Status()

At this point, the grid can be built.  The difference with this object is that the status object is passed.  That status object can be used to evaluate if records will be submitted and if any will be rejected.

// Build the grid – basically a refresh/retrieve
DataGrid grid = builder.build(status)
println("Total number of cells accepted: status.numAcceptedCells")
println("Total number of cells rejected: status.numRejectedCells")
println("First 100 rejected cells: status.cellsRejected")

Finally, save the grid to submit the data to the database.

// Save the data to the cube
cube.saveGrid(grid)

Finish Up

This all seems pretty simple.  I can’t say it enough.  Spend some time understanding Groovy collections, especially how to manipulate them.  I guarantee the time you spend will be time well spent.  I will be posting another article on how to diagnose issues and troubleshoot grid errors, whether it be grids that won’t return results, or grids that won’t save data.  Hope this was valuable!


Adventures in Groovy – Part 27: Understanding Collections

Because so many methods in PBCS require parameters that are maps and lists, it is very important to your productivity and effectiveness to understand, use, and be able to manipulate collections.  Collections include lists, maps, and ranges.  These are based on Java collection types and include a ton of useful methods.  This article will cover lists and maps.

  • Lists are objects that are embedded in brackets and separated by commas, like [Jan, Feb, Mar].
  • Maps are also known as associative arrays and are similar to lists.  Each element is separated by a colon, like  [Revenue:678979, Expense:34387].

Not to jump too far ahead, but these objects aren’t limited to holding strings.  They can hold numeric values, lists inside of lists, maps inside of lists, or really almost any combination of these objects.

Time Well Spent

There is a lot of information in this post.  Before you page down, or read a little and get bored, I highly recommend you invest the time and understand the content.  The feedback from everybody that I gave this information to prior to this post said it made a huge impact and really cleared up a lot of questions they had.

A Little About Lists and Maps And Why Understanding It Is Important

Lists and Maps are used in a number of places that are frequently used in Groovy calculations.  Gridbuilder and DataMap objects are dependent on these objects.  You may be building the POV by embedding strings into what is actually a list without even knowing it. I have done this in previous examples to keep it simple and explainable.

String sYear = '"' + operation.grid.pov.find{it.dimName =='Years'}.essbaseMbrName + '"'
String sScenario = '"' + operation.grid.pov.find{it.dimName =='Scenario'}.essbaseMbrName + '"'
String sCompany = operation.grid.getCellWithMembers().getMemberName("Company")
String sChannel = '"' + operation.grid.pov.find{it.dimName =='Channel'}.essbaseMbrName + '"'
String sMaterialGroup = '"' + operation.grid.pov.find{it.dimName =='Material_Group'}.essbaseMbrName + '"'

operation.application.getDataMap("[name of map]").execute(["Company":sCompany,"Channel":sChannel,"Material_Group":sMaterialGroup,"Vendor":sVendor,"Scenario":sScenario,"Version":"OEP_Working","Years":sYear,"Source":"NBF_Source","Currency":"Local,USD","Account":accountPush],true)

builder.addPov(['Years', 'Scenario', 'Version', 'Company','Channel','Material_Group','Source','Vendor','View'], [sYear.tokenize(), sScenario.tokenize(), ['OEP_Working'], [sCompany],['Tot_Channel'],['Total_Material_Group'],['Tot_Source'],['Tot_Vendor'],['MTD']])

Since the POV and DataMap include lists and maps, building them can also be done by pulling the grid POV, which is a map.   Lists can be extracted from the map.  There are some additional members that are required that are not in the Web Form, so a few dimensions have to be added.

Hopefully the following example will emphasize the importance of understanding these objects and the methods associated to them.  The above is not a ton of work, but replicating this hundreds of times and having the foresight to think about how functions can be reused  highlights why understanding lists, and understanding Groovy, will help you provide solutions that are more manageable to maintain.  The following replicates what was above in a more effective and readable way, in my opinion.  It may seem more complex, but give it a chance.  I think you will find it easier once you understand it, and less work to develop Groovy calculations.

Example Setup

Assume the user changes Units for Jan, Feb, and Mar for NBF1 in the Data Form below.  Net Sales is impacted as it is calculated.  The business rule that runs calculates currency, so that will also have to be included in the DataMap and GridBuilder.

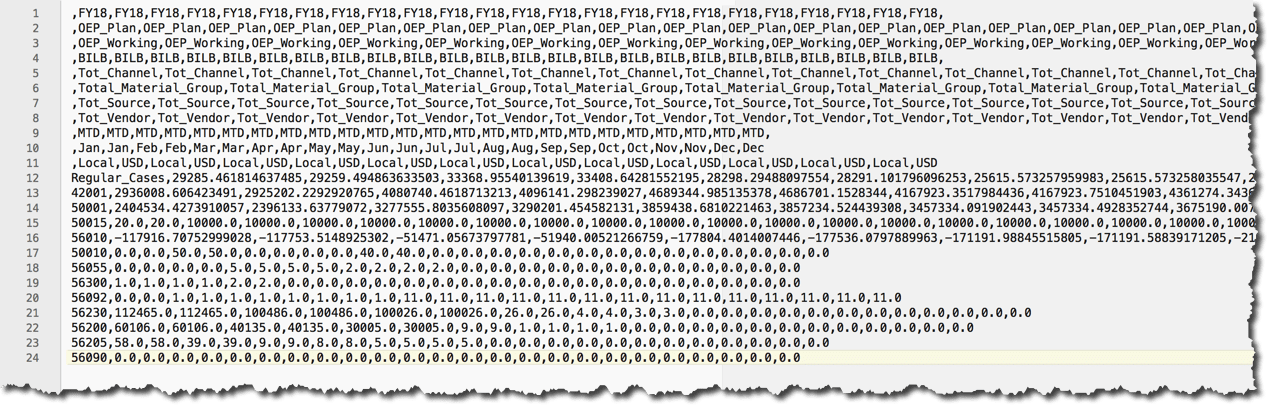
The POV for the form looks like this.

Replicating The DataMap Using A Groovy Map Object

Executing a Data Map uses a Groovy map built from the Data Form POV.  Currency has to be altered.  The edited rows and columns are appended.  For a complete explanation of how to get the edited cells, read Part 3: Acting On Edited Cells.

// Create a map from the data form POV
def povMap = [:]
operation.grid.pov.each{povMap[$it.dimName] = $it.essbaseMbrName}
// Update Currency to include Local AND USD 
povMap['Currency'] = 'Local,USD' 
// Add the vendor and accounts that have been changed 
povMap2.put('Period', sPeriods)
povMap2.put('Account', accountPush)
povMap2.put ('Vendor', sVendor)
// Execute the data map with all the dimensional overrides
operation.application.getDataMap("[name of generic map]").execute(povMap,true)

Let’s walk through the results of the script.  The povMap when created from the Data Form starts with

  • [Version:OEP_Working,
  • Source:NBF_Source,
  • Currency:Local,
  • Company:BILB,
  • Years:FY18,
  • Scenario:OEP_Plan,
  • Material_Group:mI03,
  • Channel:c01]

Once this map is created, there are some edits made.

  1. Currency is changed from Local to Local, USD.
  2. Periods is added as Jan, Feb, Mar.
  3. Account is added as Units, Net_Sales.
  4. Vendors is added as NBF1.

This method requires fewer lines, is much easier to repeat, is easier to read, and can be reused for other functions.

Replicating The GridBuilder POV Using A Groovy Map Object

Assume the data is now going to be replicated to another cube using a GridBuilder.  In the example available in Part 21: Real Time Data Movement (Getting REALLY Groovy), the data is moved to a P&L cube at a summary level and doesn’t include the channel, material group, and vendor dimensions.  A new Groovy map can be created (which we will do here), or we can alter the existing one above.  The source grid would then need to pull data at the total of all these dimensions.  Currency and Period need to be removed as they are in the columns.  Account will be removed and placed in the rows.

def povGridMap = [:]
operation.grid.pov.each{povGridMap[it.dimName] = it.essbaseMbrName}

// Remove dimensions that will be in the rows and columns
povGridMap.remove('Currency')

// Add View dimiension
povGridMap['View'] = 'MTD'

// Change the dimensions that need to pull totals
povGridMap['Channel'] = 'Total_Channel'
povGridMap['Material_Group'] = 'Total_Material_Group' 
povGridMap['Vendor'] = 'Total_Vendor' // Another way to add a new element to the map

builder.addPov(povGridMap.keySet() as List, povGridMap.values().collect{[it]} as List)
// the reason this requires the as List notation is because the addPOV method requires 
// the parameter to be a list type
// From the Java Docs:
// void setPov(java.util.List<java.lang.String> dimensions,
//             java.util.List<java.util.List<java.lang.String>> members)

Let’s walk through the results of the script.  The povMap when created from the Data Form starts with

  • [Version:OEP_Working,
  • Source:NBF_Source,
  • Currency:Local,
  • Company:BILB,
  • Years:FY18,
  • Scenario:OEP_Plan,
  • Material_Group:mI03,
  • Channel:c01]

The edits are then made and the result is

  • [Version:OEP_Working,
  • Source:NBF_Source,
  • Company:BILB,
  • Years:FY18,
  • Scenario:OEP_Plan,
  • Material_Group:Total_Material_Group,
  • Channel:Total_Channel,
  • Vendor:Total_Vendor]

Moving On

Hopefully the difference in the two strategies inspires you to learn a little more about the objects and methods below.

The remainder of this article shows examples that will be extremely useful, and some that will just give you some insight to what is possible.

Lists

Creating And Editing Lists

Lists can be created and referenced a number of ways.  Empty lists can be created.

def emptyList = []

Lists can be created by adding the elements.

Def q1List = [‘Jan’,’Feb’,’Mar’]

Lists can be altered by adding new elements.

def q2List = [‘Apr’]
q2List << (‘May’)
q2List.add(‘Jun’)

or

q2List.addAll(['Apr', 'May', 'Jun'])

They can even be added at specific places.

def q2List = ['Apr']
q2List << ('Jun')
q2List.put(1,'May') // which places it after Apr and before Jun

Elements can be edited based on location.

q2List.set(1,'May') // second item
q2List[-2]'May' // go back 2 from end
q2List[1]'May' / second item

Elements can be removed from lists.

q2List << (‘Jul’)
q2List.remove('Jul')

or

q2List.removeIf{it == 'Jul'}

or

 ['a','b','c','b','b'] - ['b','c'] // result is ['a']
Iterating Lists

Iterating on elements of a list is usually done by using one of the following.

  • each
  • eachWithIndex (same as each but include the index of the element)
['Jan','Feb','Mar'].each { month ->
    println "Item: $month"
}
// With the index of the element
['Jan','Feb','Mar'].eachWithIndex { month, index ->
    println "Item: $month is index $index"
}

The list can be altered while iterating, too.  This doesn’t update the list.  It only produces a new list.

println [1, 2, 3].collect { it * 2 }  //would produce [2, 4, 6]
Manipulating lists
Filtering and searching

There are tons of filtering and searching options.  The following are examples, but it isn’t even close to an exhaustive list.  Hopefully it will inspire some thought as to how you can use these methods.

// find 1st element matching criteria
[1, 2, 3].find { it > 1 } // results in 2

// find all elements matching criteria
[1, 2, 3].findAll { it > 1 } // results in [2, 3]

// find index of 1st element matching criteria
['a', 'b', 'c', 'd', 'e'].findIndexOf {it in ['c', 'e', 'g']} // results in 2

['a', 'b', 'c', 'd', 'c'].indexOf('c') // index returned (2)
['a', 'b', 'c', 'd', 'c'].indexOf('z') // index -1 means value not in list
['a', 'b', 'c', 'd', 'c'].lastIndexOf('c') // 4 is returned

[1, 2, 3].every { it < 5 }               // returns true if all elements match the predicate

![1, 2, 3].every { it < 3 }

[1, 2, 3].any { it > 2 }                 // returns true if any element matches the predicate

![1, 2, 3].any { it > 3 }

[1, 2, 3, 4, 5, 6].sum() == 21                // sum anything with a plus() method
['a', 'b', 'c', 'd', 'e'].sum() // 'abcde'
[['a', 'b'], ['c', 'd']].sum() // ['a', 'b', 'c', 'd']

// an initial value can be provided
[].sum(1000) //  1000

[1, 2, 3].sum(1000) //  1006

[1, 2, 3].join('-') //  '1-2-3'

def list = [9, 4, 2, 10, 5]
list.max() // 10
list.min() // 2

// we can also compare single characters, as anything comparable
assert ['x', 'y', 'a', 'z'].min() // 'a'

// we can use a closure to specify the sorting behavior
def list2 = ['abc', 'z', 'xyzuvw', 'Hello', '321']
list2.max { it.size() } //  'xyzuvw'
list2.min { it.size() } //  'z'

['a','b','c'].contains('a')      // true

[1,3,4].containsAll([1,4])       // true

[1,2,3,3,3,3,4,5].count(3)  // 4
Sorting

Groovy offers a variety of options to sort lists, from using closures to comparators.

[6, 3, 9, 2, 7, 1, 5].sort() // [1, 2, 3, 5, 6, 7, 9]
def list = ['abc', 'z', 'xyzuvw', 'Hello', '321']
list.sort {it.size()} // ['z', 'abc', '321', 'Hello', 'xyzuvw']

def list2 = [7, 4, -6, -1, 11, 2, 3, -9, 5, -13]

Maps

Literals

In Groovy, maps (also known as associative arrays) can be created using the map literal syntax: [:].  Maps are use to create associations between two or more elements.  They can be used to lookup values like currency rates, map accounts from one plan type to another, and a host of other things.  Many of the API methods require maps to be passed.

def map = [name: 'Gromit', likes: 'cheese', id: 1234]
map.get('name')   //  'Gromit'
map.get('id')   // 1234
map['name']   // 'Gromit'
map['id'] == 1234

def emptyMap = [:]
emptyMap.size()   // 0
emptyMap.put("foo", 5)
emptyMap.size()   // 1
emptyMap.get("foo")   // 5
Map Notation

Maps also act like joins so you can use the property notation to get/set items inside the Map as long as the keys are strings which are valid Groovy identifiers:

def map = [name: 'Gromit', likes: 'cheese', id: 1234]
map.name   // 'Gromit'  -    can be used instead of map.get('name')
map.id   // 1234

def emptyMap = [:]
emptyMap.size()   // 0
emptyMap.foo = 5
emptyMap.size()   // 1
emptyMap.foo   // 5
Iterating Maps

Maps makes use of the each and eachWithIndex methods to itarate through maps, just like Lists.

def map = [
        Bob  : 42,
        Alice: 54,
        Max  : 33
]

// Loop through each item
map.each { entry ->
    println "Name: $entry.key Age: $entry.value"
}

// add an index
map.eachWithIndex { entry, i ->
    println "$i - Name: $entry.key Age: $entry.value"
}

// Alternatively you can use key and value directly
map.each { key, value ->
    println "Name: $key Age: $value"
}

// Key, value and i as the index in the map
map.eachWithIndex { key, value, i ->
    println "$i - Name: $key Age: $value"

Manipulating Maps

Adding/Removing Elements

Adding an element to a map can be done either using the put method, the subscript operator or using putAll.

def defaults = [1: 'a', 2: 'b', 3: 'c', 4: 'd']
def overrides = [2: 'z', 5: 'x', 13: 'x']

def result = new LinkedHashMap(defaults)
result.put(15, 't')
result[17] = 'u'
result.putAll(overrides) // [1: 'a', 2: 'z', 3: 'c', 4: 'd', 5: 'x', 13: 'x', 15: 't', 17: 'u']

Removing all the elements of a map can be done by calling the clear method:

def m = [1:'a', 2:'b']
println m.get(1) //  'a'
m.clear()
Filtering and searching

It is useful to search and filter maps, and here are some examples of this functionality.

def people = [
    1: [name:'Bob', age: 32, gender: 'M'],
    2: [name:'Johnny', age: 36, gender: 'M'],
    3: [name:'Claire', age: 21, gender: 'F'],
    4: [name:'Amy', age: 54, gender:'F']
]

def bob = people.find { it.value.name == 'Bob' } // find a single entry
def females = people.findAll { it.value.gender == 'F' }

// both return entries, but you can use collect to retrieve the ages for example
def ageOfBob = bob.value.age
def agesOfFemales = females.collect {
    it.value.age
}
// ageOfBob == 32, agesOfFemales == [21,54]

def agesOfMales = people.findAll { id, person -> person.gender == 'M'}.collect { id, person ->
    person.age
}
// agesOfMales == [32, 36]

// `any` returns true if any entry matches the predicate
people.any { id, person -> person.age == 54 }

Conclusion

There is a lot of information and examples here.  What I hope you walk away with is an understanding of what a list and a map is, most importantly.  Understanding how to use these in the API is really important, and manipulating them will save you a ton of time and unnecessary code.


Adventures in Groovy – Part 26: Is the POV a level 0 member?

One of the more surprisingly useful things that can be done in a Groovy calculation is querying metadata. This was discussed in Part 11: Accessing Metadata Properties, but I recently had a situation where users could load data at parent levels and have it allocated down to the bottom of the hierarchies.  Knowing if users selected a parent member in the hierarchy was critical because the business process was different based on whether it was a parent or a level 0 member.  This can obviously be checked in a business rule, but I had the need to alter several functions in the process if the selection was a parent.  Smart Pushes and data synchronizations, as well as the business rules that were executed, were dependent on the level of the hierarchy selected.  This is possible with Groovy.

The Code Explained

Using a combination of methods, the children of any member can be returned in a list.  That list can be used for all kinds of things.  This focuses on getting the size of the list to identify if it has children.

// Normally getting the POV Selected, but this is hard coded for the example
def povProduct = '"' + "Tents" + '"' 
// Setup a connection to the cube
Cube cube = operation.application.getCube("GP")
// Create a dimension object
Dimension productDim = operation.application.getDimension("Product", cube)
// Create a member list - ILev0 of the member passed
def MemberList = productDim.getEvaluatedMembers("ILvl0Descendants($povProduct)", cube) 

println MemberList
println MemberList.size() == 1 // will print true or false

The MemberList variable now holds a list of all the members (level 0 members below tents), including the member passed in the function.  This will always have at least one item in the list, assuming the member exists in the dimension.  If there is more than 1, we know it has children, and therefore, is not a level 0 member.

if(MemberList.size() == 1)
  {
  //actions taken if the POV is a level 0 selection
  }
  else
  {
  //actions taken if the POV is NOT a level 0 selection
  }

Summary

In applications where top down planning is needed, different logic runs when data is entered at a parent verses when it is entered at a leaf (lev0) member.  This can be handled in an Essbase calculation using @ISLEV0, but with Groovy, the fix statement can be altered so that unnecessary logic isn’t executed and data pushes are limited to only what is impacted.

Do you have an idea of how you might benefit from the results of metadata queries?  Come up with your own and share with the group by commenting below.